In this post, I will demonstrate how to create a Virtual Machine on VMware ESXi. About my setup, I have a Physical Server ThinkSystem SR650 on which hypervisor VMware ESXi is installed.
Here, I am going to create a VM for SAP HANA Server, along with the relative settings.
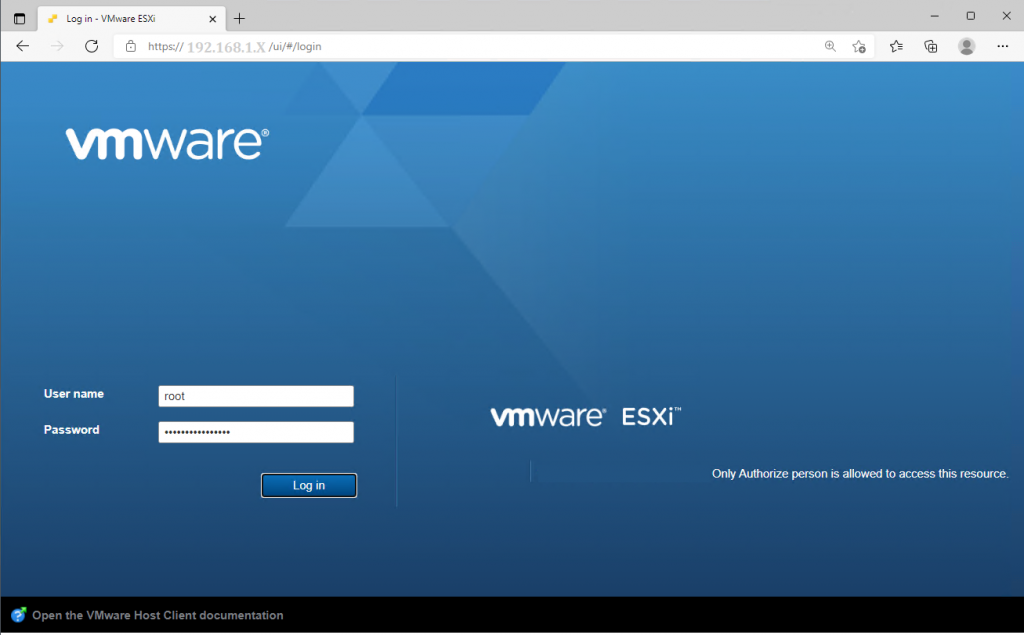
Type the ESXi Host Server’s IP. This will launch the VMware ESXi login page. Enter the credentials either of root access or the other user who has the access to create a VM.
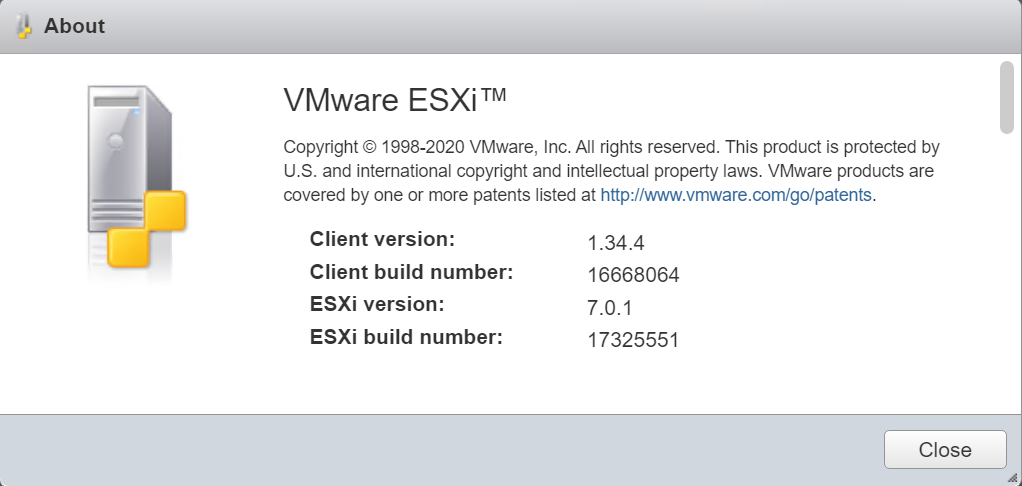
Before I begin creating a VM, I want to show you the product and its version on which I will be working on.
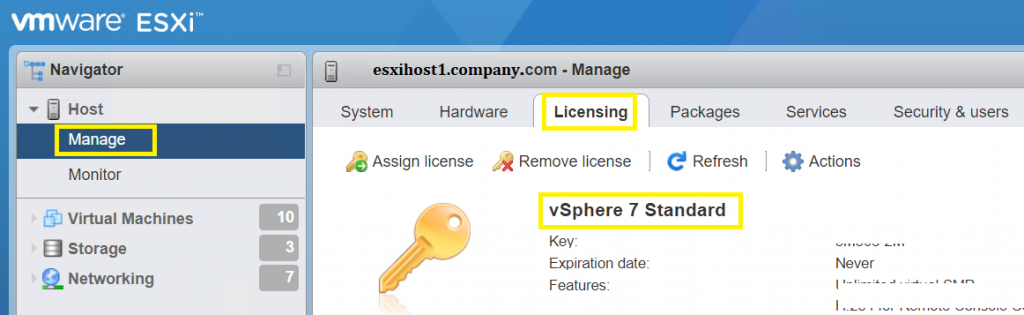
vSphere Standard is the product I have on VMware ESXi which is Licensed and is perpetual.
Before working on creating a VM on ESXi, one has to do thorough research on the subject.
Following are some important references which are required to cover and should be compliant with it.
- VMware Compatibility Guide
- SAP Note: 2235581 – SAP HANA: Supported Operating Systems
- SAP Note: 2937606 – SAP HANA on VMware vSphere 7.0 in production
- SAP Note: 1793345 – Sizing for SAP Suite on HANA
- https://www.vmware.com/solutions/business-critical-apps/sap-virtualization.html
Click on Resources (tab) to find documents on VMware VSphere & SAP HANA. - https://blogs.vmware.com/apps/sap
There are documents available w.r.t VSphere and SAP HANA, do thorough research and apply the suitable recommended solutions. - https://geek-university.com/vmware-esxi/shares-explained
- https://geek-university.com/vmware-esxi/types-of-virtual-disks
- https://docs.vmware.com/en/VMware-vSphere/index.html
- https://wiki.scn.sap.com/wiki/display/VIRTUALIZATION/SAP+on+VMware+vSphere
- https://wiki.scn.sap.com/wiki/display/VIRTUALIZATION/SAP+HANA+on+VMware+vSphere
Especially, refer the article on: SAP HANA on vSphere 6.5 and later – Configuration / Best Practices Parameter List.
To create a VM click on ‘Virtual Machine’ on the left pane and then click on the ‘Create / Register VM’ option.
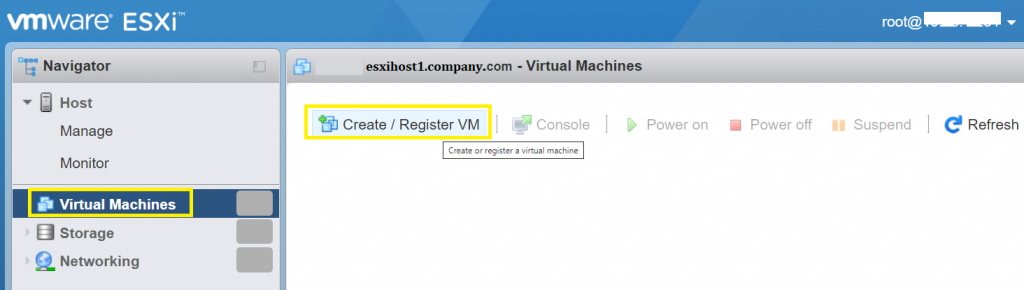
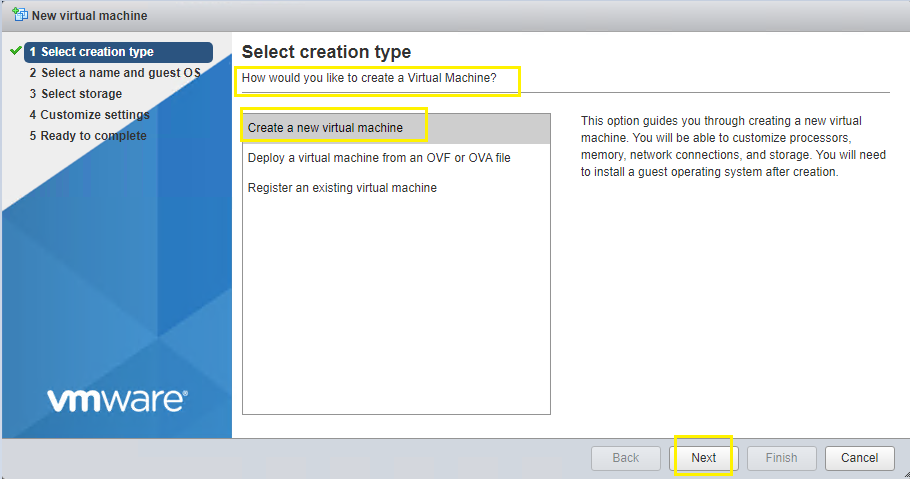
Clicking on Create option will launch the ‘New virtual machine’ wizard. Choose your option as required, and click on Next.
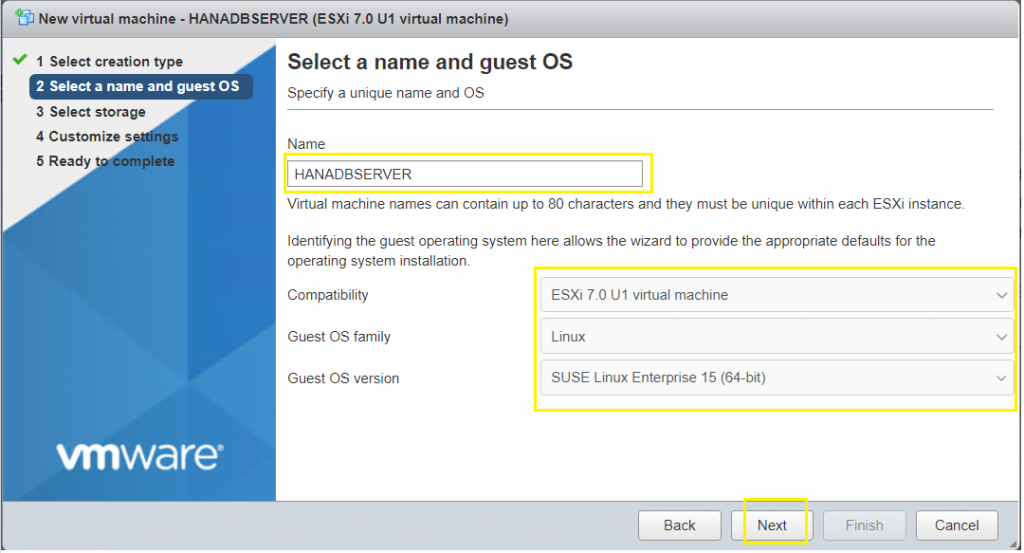
Enter the Name for your VM and choose the ‘Compatibility’, ‘Guest OS family’ and ‘Guest OS version’ as per your setup’s requirement and it should also be compliant with the above references.
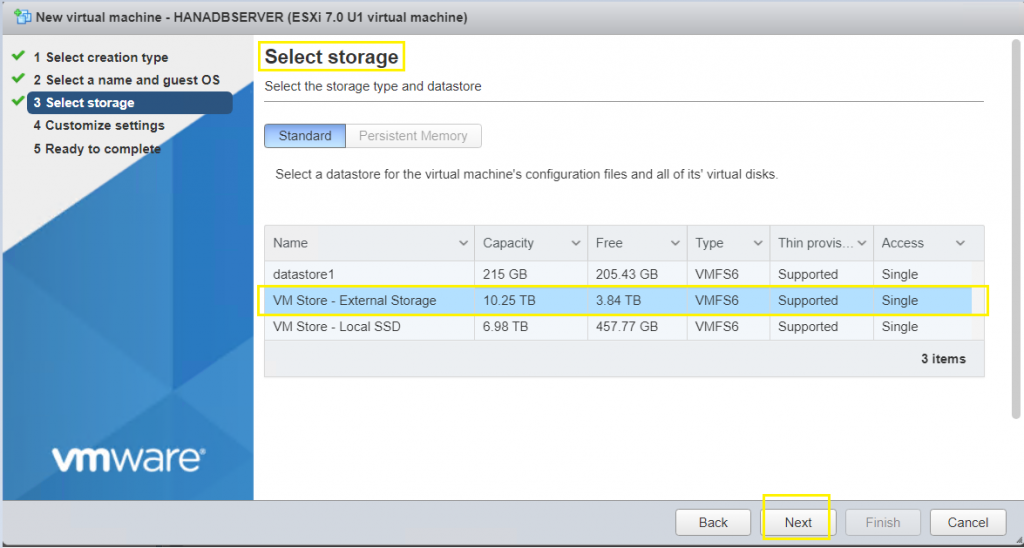
Select the storage from your Datastore where you have enough free space available. Your VM will be created on the specified Storage/Datastore. I chose the one as shown below, (click on Next to proceed).
One has to do thorough research on each of the resources w.r.t their type of solution i.e., their Server type(physical/virtual/cloud, etc), hardware vendor, type of platform, type of hypervisor, and under each resource there are many features given for which the right settings are required for the Server to perform at its best.
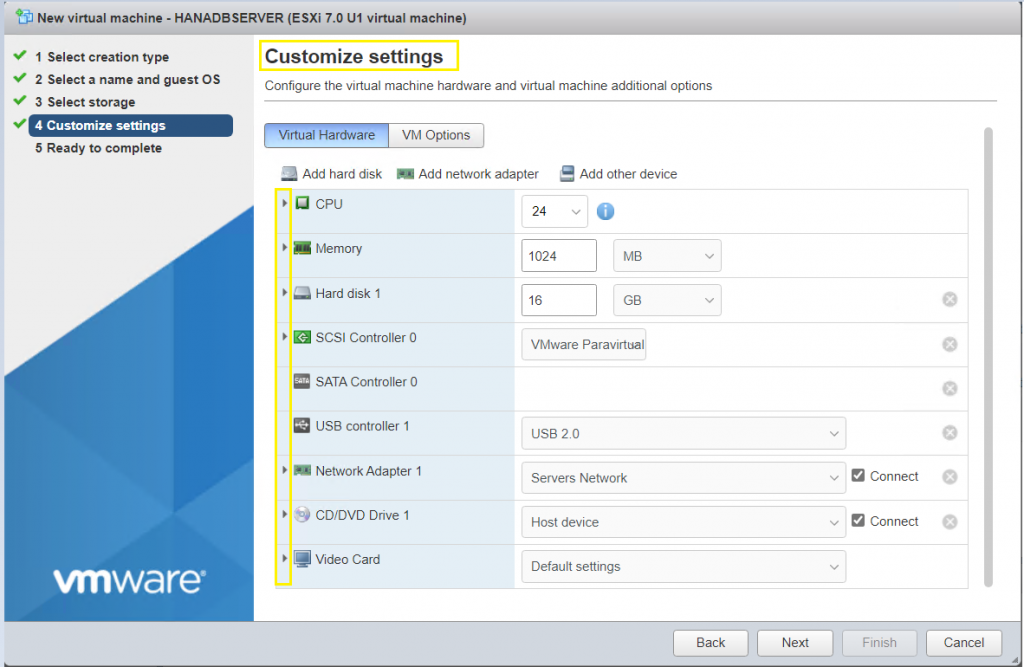
Grant the vCPUs and their affiliated settings as per your Server’s load. This depends from system to system. Here, for the demo purpose, I am granting some basic allotment of resources that suffice my system requirements to run at its best.
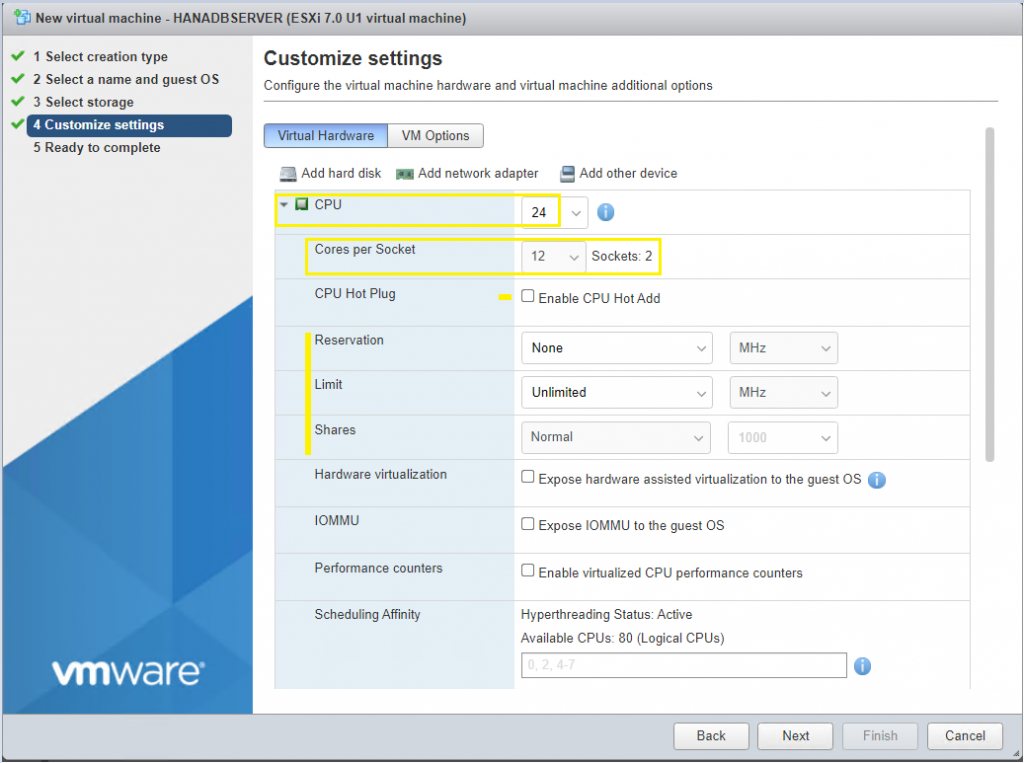
Similarly, I am granting Memory and choosing its related settings as shown below.
Please note Reserving memory is required to tick or not. In case you have sufficient resources and the priority is to lock/reserve the memory of the Production Server then tick the Reserve memory option.
Click on ‘Next’ to proceed.
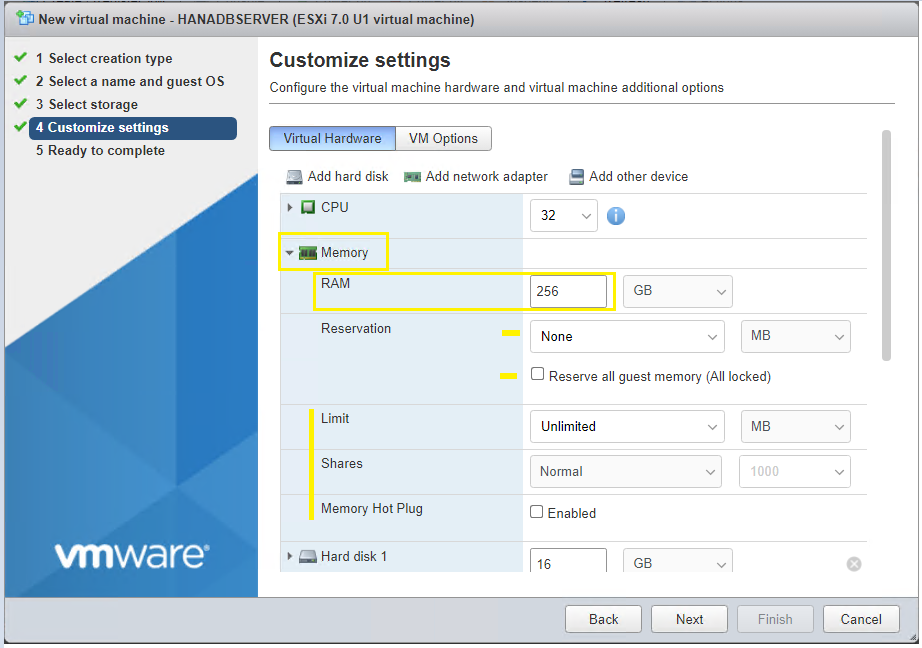
Choosing a Hard disk, Disk Provisioning, and Disk mode is very crucial. Make sure you refer to the above-provided references on each of the highlighted settings. For the Database Server, it is recommended to choose as shown below.
I am going to use a 300 GB hard disk for OS installation.
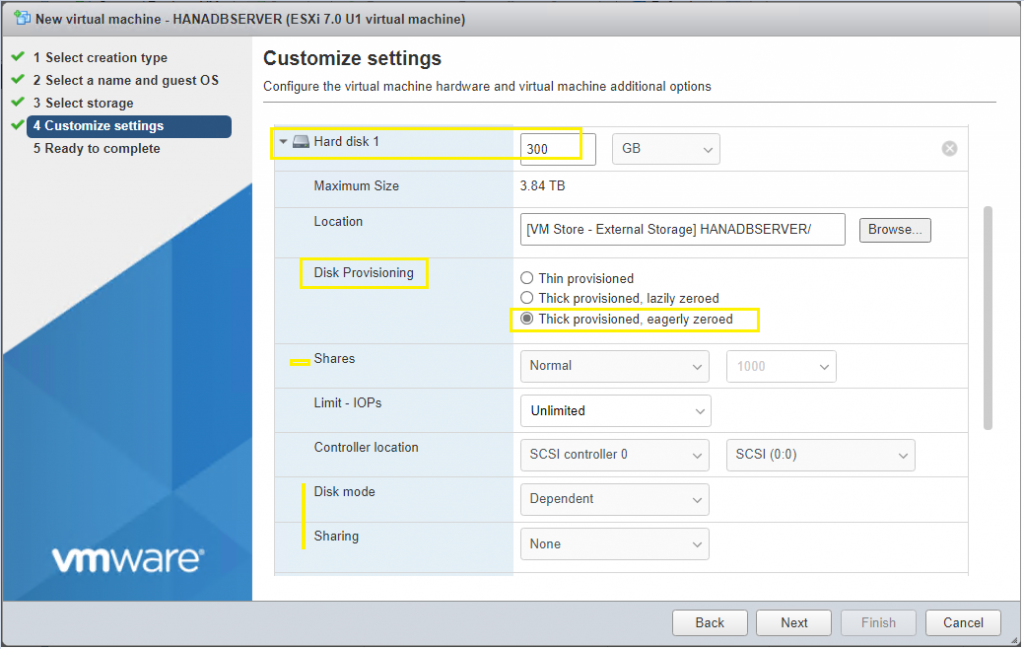
The below screenshot shows how to add an additional hard disk.
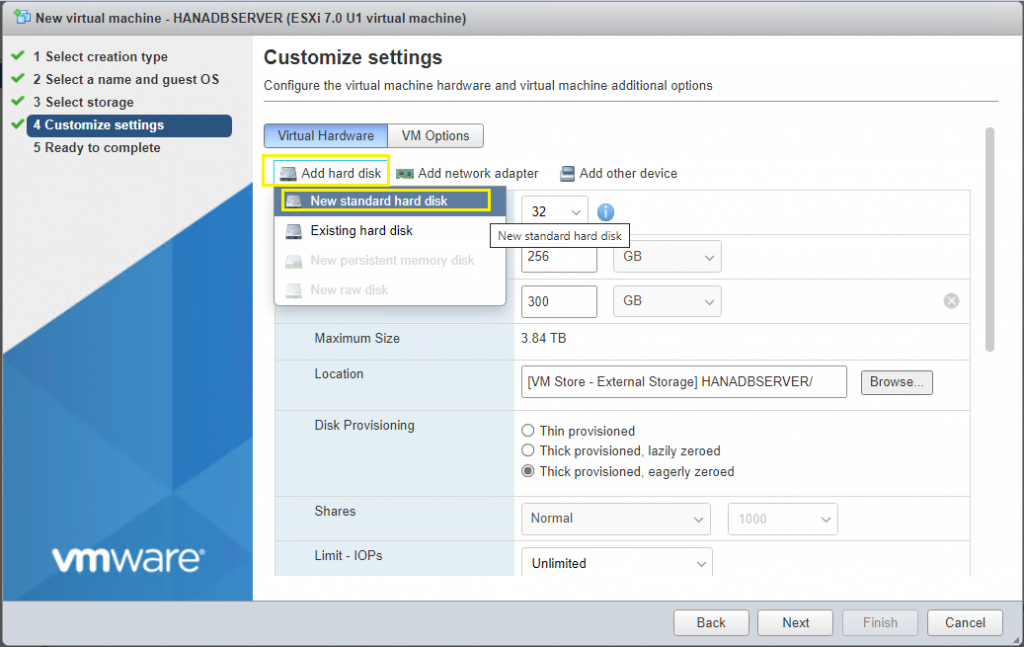
In my case, the additional hard disk of 1.5 TB is for the SAP HANA setup. This depends on system load and its setup, you have to allocate hard disk accordingly.
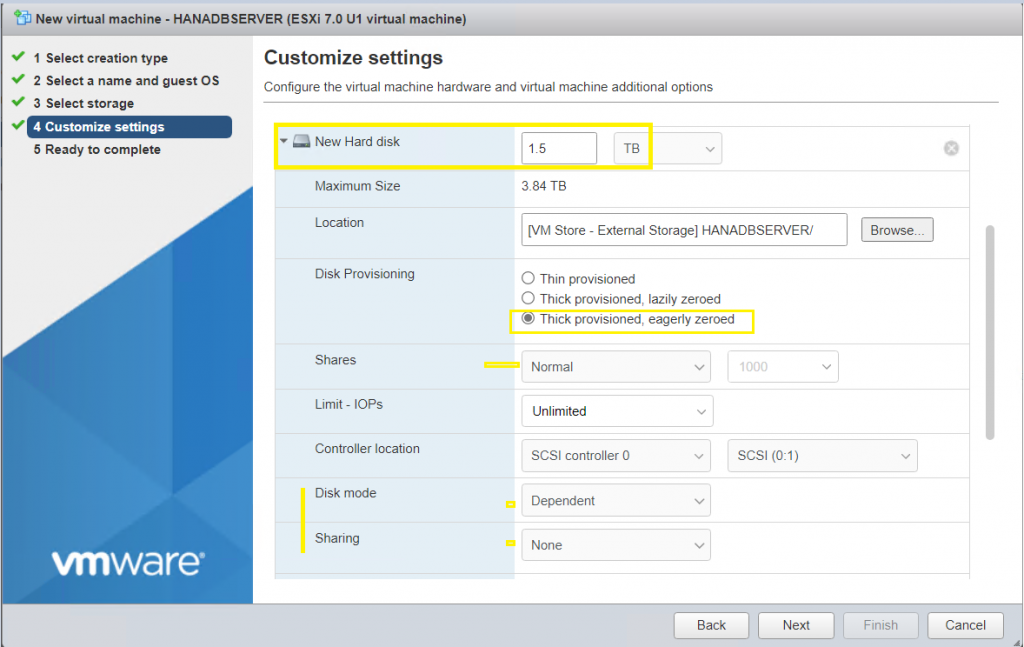
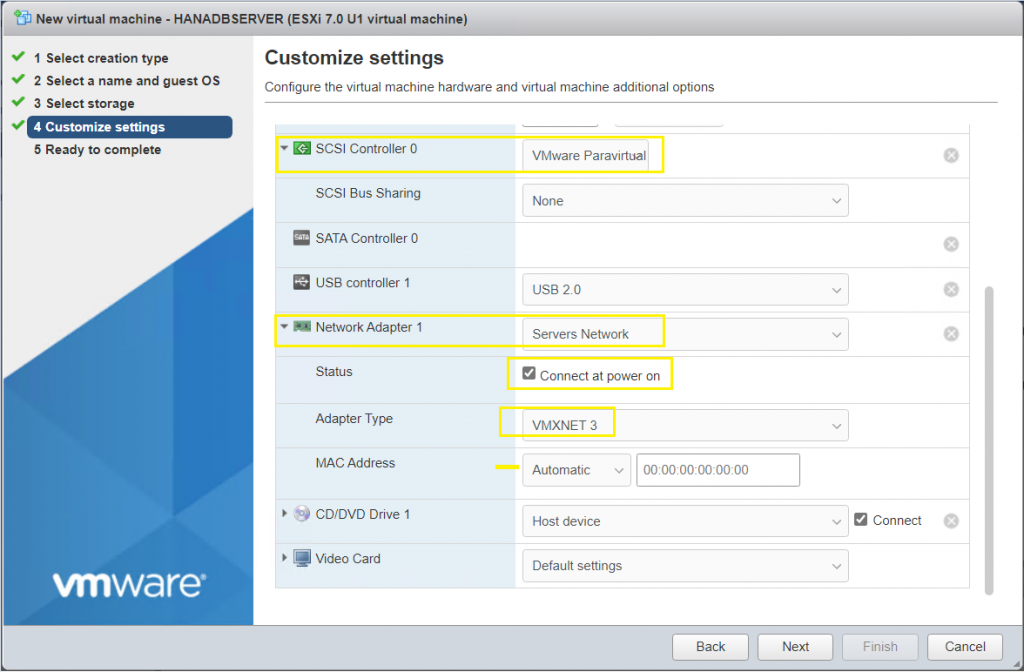
The below settings are recommended by VMware & SAP HANA.
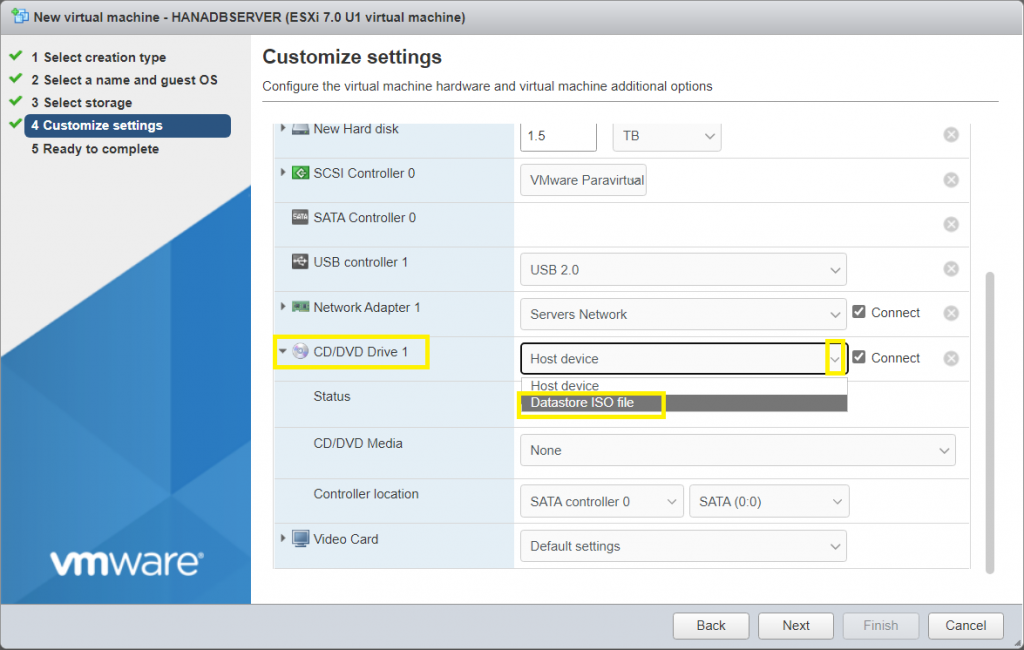
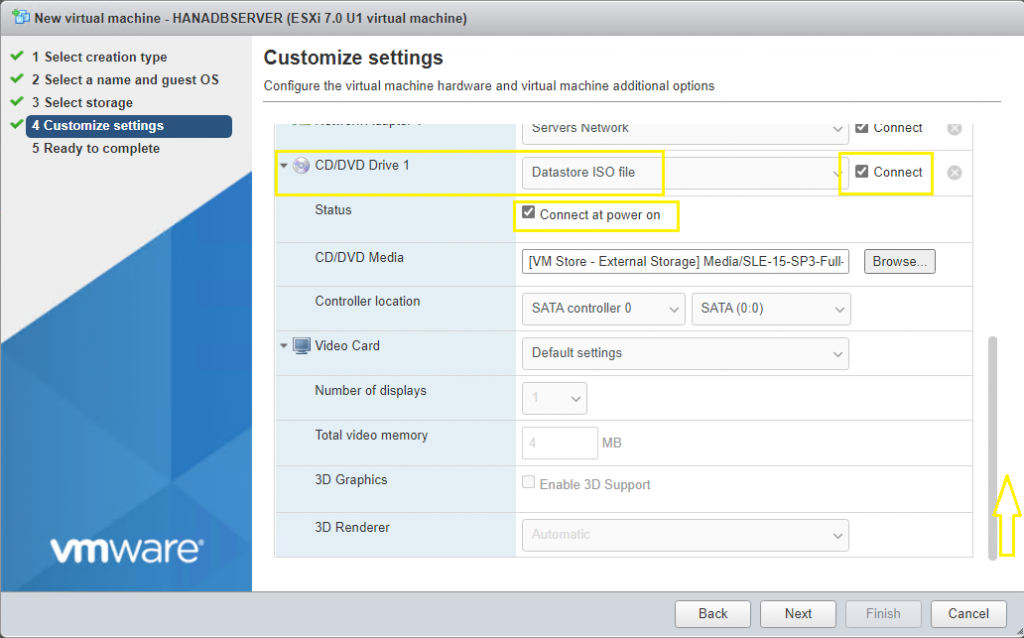
Here, I have already uploaded Operating System ISO on VMware Datastore. Choose ‘Datastore ISO file’.
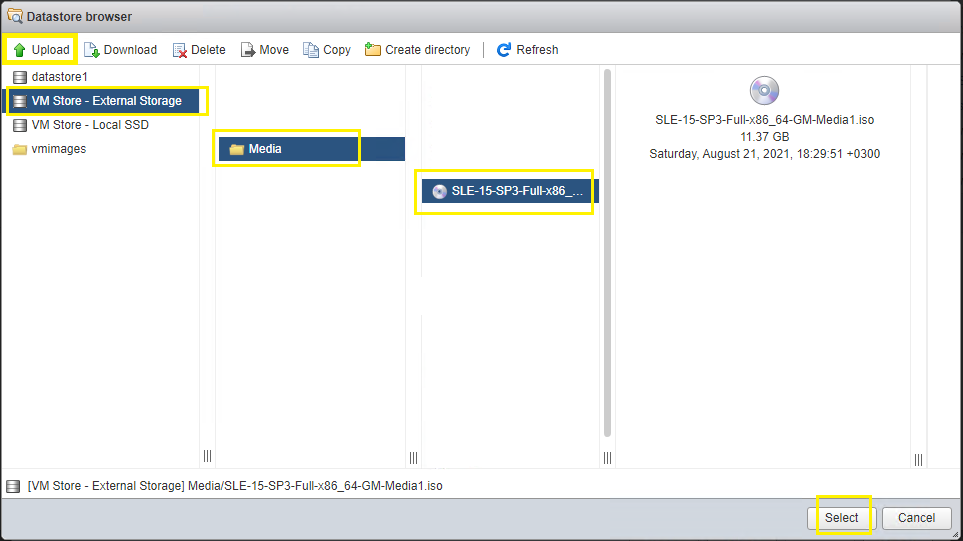
Browse for the relevant ISO and click on select.
Ensure selected ISO is on ‘Connect’ and tick the ‘Connect at power on’. With this, you are done with the ‘Customize settings’ of ‘Virtual Hardware’ now scroll up and click on ‘VM Options’ tab.
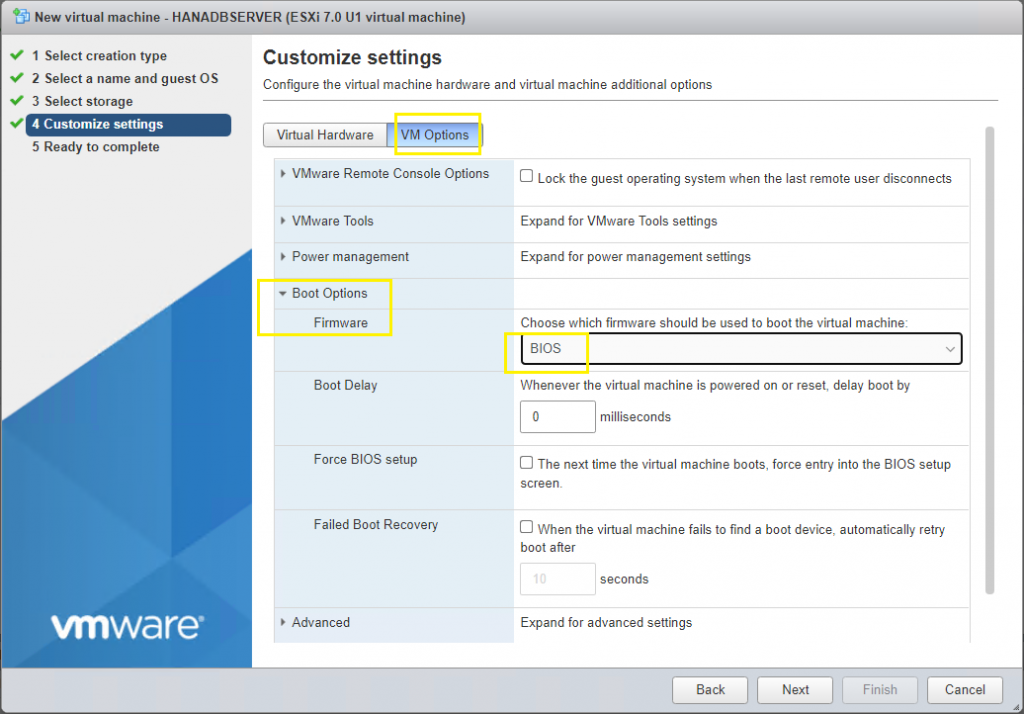
Under ‘VM Options’ there are a few settings that need to be taken care of. Expand ‘Boot Options’ set ‘Firmware’ as BIOS.
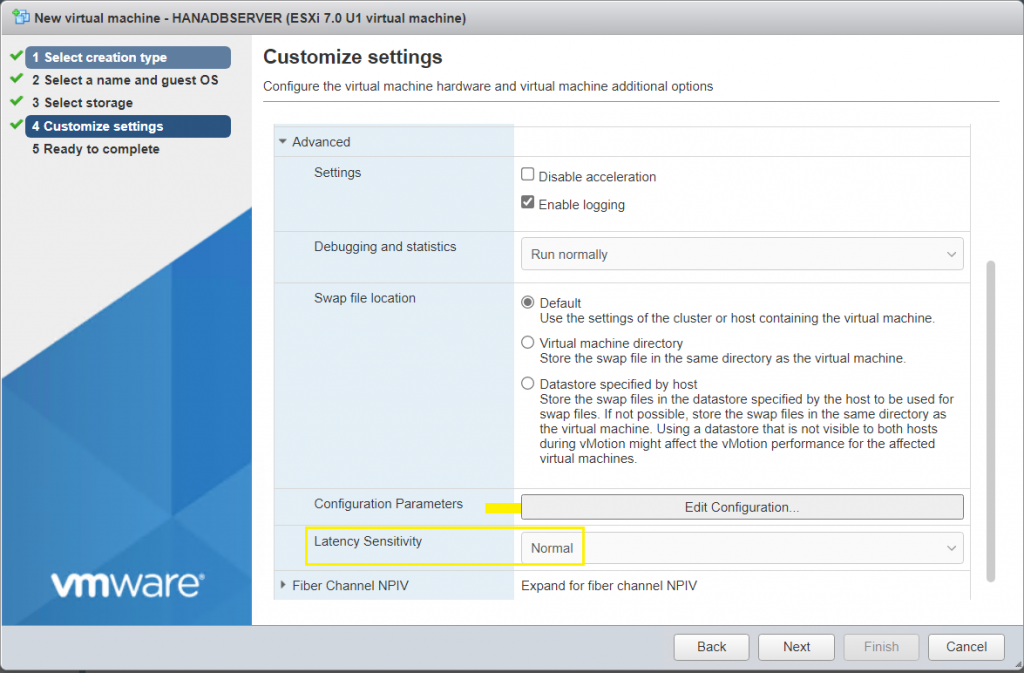
Expand the ‘Advanced’ setting and set ‘Latency Sensitivity’ to ‘Normal’. I have just highlighted the ‘Configuration Parameters’ at the moment to say that once the VM is created, I need to revisit to add a parameter before OS installation.
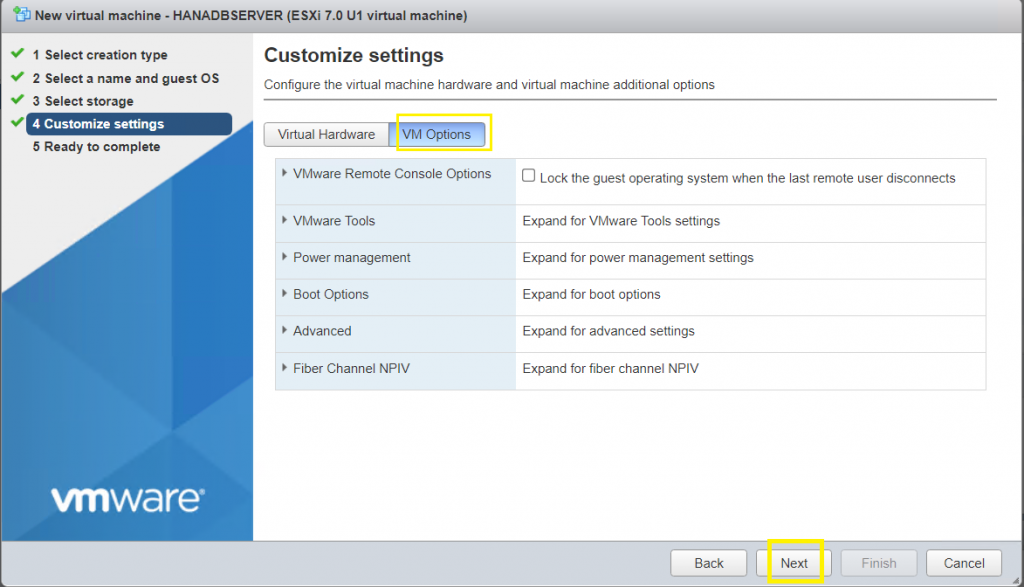
Therefore, I am done with Customizing VM Options. Click on ‘Next’ to review the settings.
Here, I can see all the settings which I chose for creating a VM. If you want to change anything you can click on the Back button and set it rightly. In my case, I reviewed and clicked on ‘Finish’.
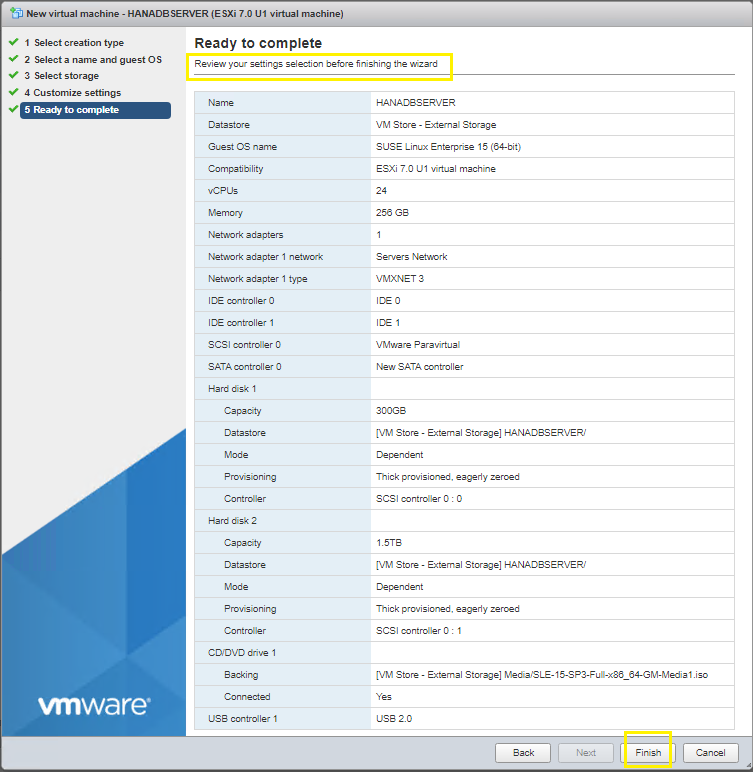
After you click on ‘Finish’ it will start creating a VM on VMware ESXi. ‘Create VM’ task will take a longer time if the Disk provisioned is Thick. If it is Thin it will be created faster.
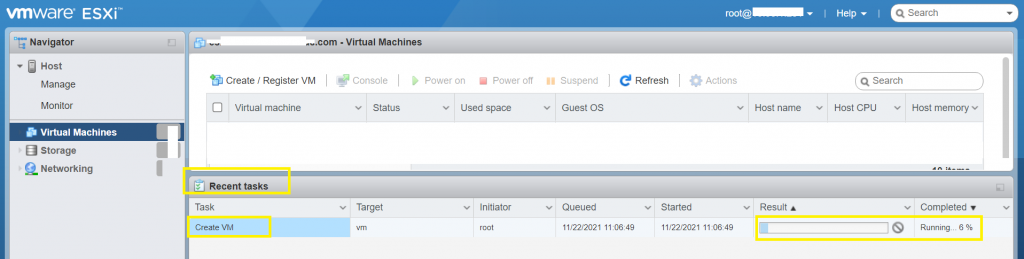
Wait until the ‘Create VM’ task completes.
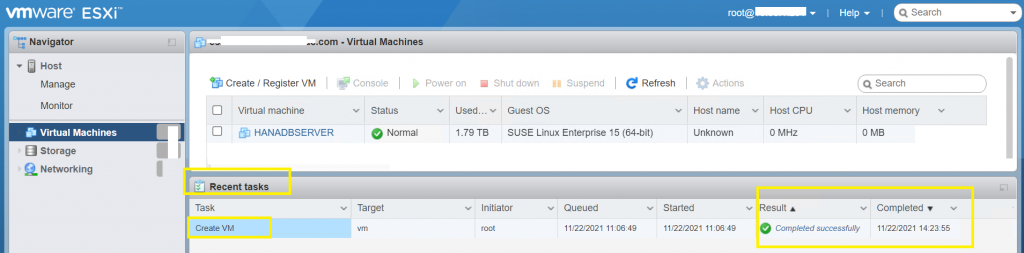
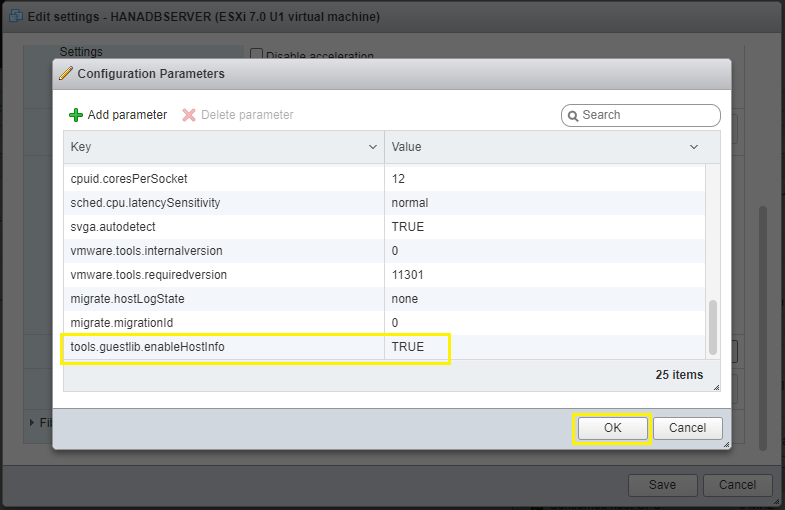
Click on Virtual Machine name and click on Edit. Click on VM Options and expand ‘Advanced’ and then click on ‘Edit Configuration’ against Configuration Parameters. Click on Add parameter option.
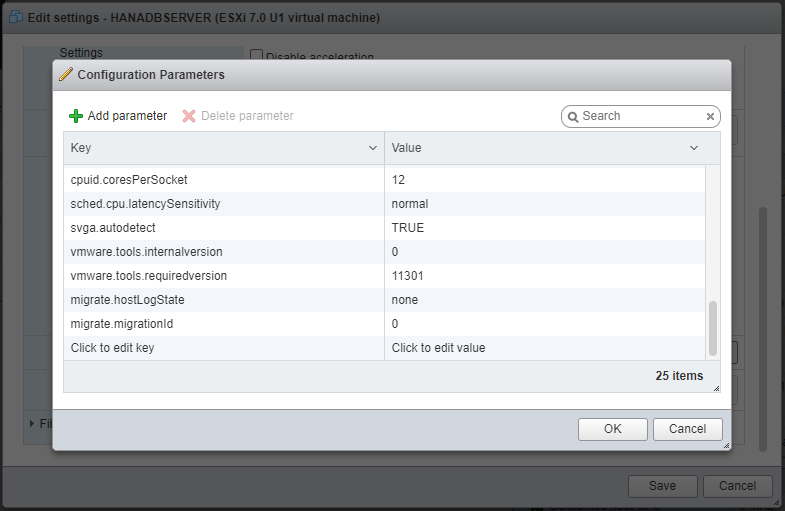
Add the highlighted parameter and assign a value to it, then click on OK.
Whatever settings we have seen in the post depends from system to system, about its load, performance, and type of environment (Production or Test). You implement and configure these settings as per your system requirement. You can add additional recommended parameters if and only if needed for your system load. As my system load is minimal I have not added other advanced parameters on VM level.
Once you are done with adding parameters on the VM level then you can Power on the Virtual Machine to boot. This will begin with the OS installation wizard.
Further to this, in another post, I have covered the topic SUSE Linux Enterprise Server for SAP Applications – Installation.